
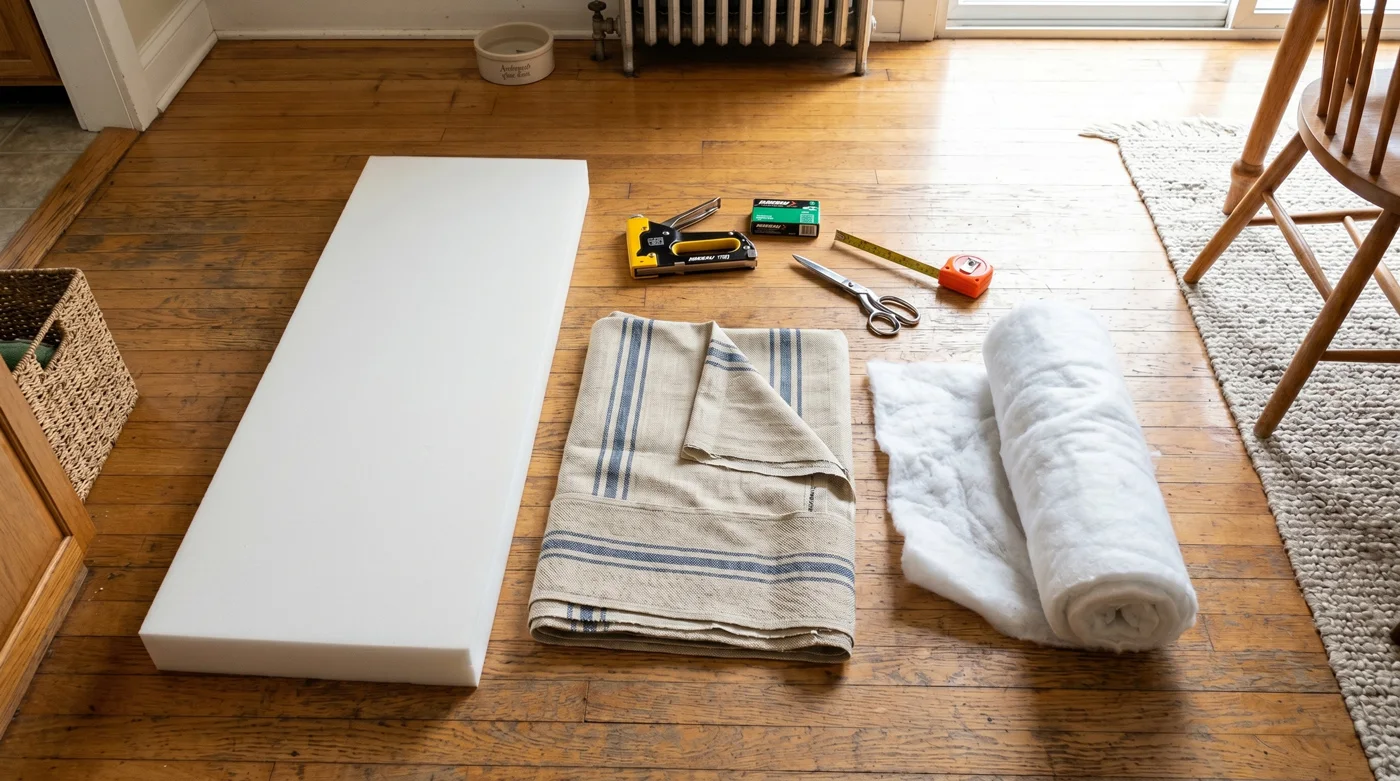
Making your own bench cushion is genuinely doable — and for the right situation, a satisfying project. This guide covers the full process, along with the honest numbers on time and cost, and a clear-eyed look at when DIY makes sense versus when ordering custom is the smarter call.
There are two types of people who search for this. The first genuinely wants to make something, either for the satisfaction of it or because their bench has an unusual shape that nothing off-the-shelf will fit. The second is hoping to save money and wants to know if DIY is worth the effort.
Both questions get answered here. The short version: yes, you can absolutely make a bench cushion yourself, and this guide will show you exactly how. But the cost comparison at the end might surprise you — because the “cheaper to DIY” assumption doesn’t always hold up once you add everything together.
What You’re Actually Building
A bench cushion has three components: a foam core that provides the structure and support, a layer of Dacron batting wrapped around the foam that softens the edges and fills out the cover, and a fabric cover that holds everything together and determines how the finished cushion looks.
The method you use to construct the cover divides DIY bench cushions into two categories. The sewn cover method produces a more polished finished result with cleaner edges and the option for a zipper or ties — but requires basic sewing ability and a machine. The no-sew (staple gun) method wraps and staples the fabric directly to a plywood backing — faster and more accessible, but limited to firm cushions that won’t be removed for cleaning. Both are covered below.
Materials and What They Actually Cost
One thing most DIY bench cushion guides don’t show you is the full materials list with realistic prices. Here it is:
| Material | What to Get | Typical Cost |
|---|---|---|
| Foam | High-density upholstery foam, 2.0–2.5 lb/ft³, cut to size | $30–80 depending on size and density |
| Dacron batting | Polyester upholstery batting, at least 1 yard | $10–20 |
| Fabric | Upholstery-weight fabric; 1.5–2.5 yards for a standard bench | $25–80 depending on fabric type |
| Plywood backing | ¼” plywood, cut to bench dimensions (no-sew method only) | $10–20 (often cut at the store) |
| Spray adhesive | 3M Super 77 or equivalent upholstery adhesive | $12–18 |
| Zipper or ties | 20″+ upholstery zipper or ribbon ties (sewn method) | $5–12 |
| Staple gun + staples | Heavy-duty staple gun, ⅜” staples (no-sew method) | $25–45 if you don’t own one |
Total realistic material cost: $80–180 depending on foam density, fabric quality, and tools you already own. Not counting your time.
Fabric is the biggest variable in that range, and it’s the one most DIY guides understate. Cheap upholstery fabric from a craft chain frays easily, is harder to sew cleanly, and won’t hold up to regular use nearly as well as proper upholstery-weight or outdoor-grade fabric. The difference between fabric types becomes very visible after the first year, so it’s worth spending on this part even if you economize elsewhere.
Step One: Measure and Cut the Foam
Measure the bench seat surface — not any existing cushion on it, which will have compressed and shifted over time. You need three numbers: length, width (depth front to back), and your target thickness. Standard bench cushions run 2 to 4 inches thick; thicker feels more comfortable for extended sitting, but very thick cushions can look disproportionate on a low bench.
Order foam pre-cut to size from an online foam supplier (Foam Factory, FoamByMail, or similar) rather than buying a large block and cutting it yourself. Custom-cut foam arrives ready to use; cutting foam at home with a serrated knife produces uneven edges that are difficult to fix and create visible lumps under the fabric. If you do need to trim foam on-site, an electric carving knife gives cleaner results than any hand tool.
Foam density matters more than most DIY guides acknowledge. High-density foam at 2.0 lb/ft³ or above maintains its shape and support through years of use. Foam below 1.8 lb/ft³ — which is what most craft stores stock — compresses noticeably within two or three seasons of daily use. Ordering from a foam specialist and specifying the density is worth the extra step.

Step Two: Wrap the Foam in Batting
Dacron batting serves two functions: it softens and rounds the edges of the foam so the corners don’t poke through the fabric, and it fills out the cover to prevent the fabric from riding directly on the foam surface (which causes premature wear and an unflattering flat look).
Cut the batting so it wraps fully over the top of the foam and extends 2 to 3 inches past the bottom edges on all sides. Spray the top surface of the foam lightly with adhesive and press the batting down, smoothing outward from the center to avoid wrinkles. Wrap the batting around the sides and spray-adhere the overlapping edges to the bottom of the foam. At the corners, fold the batting as neatly as possible — this is the step that most affects whether the finished cushion looks clean or lumpy.
Two layers of batting on top and one underneath creates a rounder, fuller look that professional upholstered cushions have. One layer is adequate but produces a flatter result. The difference is visible and worth the extra material cost if appearance matters.
Step Three: The Cover — Sewn Method
The sewn cover method produces a finished cushion that can be removed for cleaning and has clean piped or plain edges. It requires a sewing machine and basic ability to sew straight seams — not advanced skills, but not zero skills either.
Cut your fabric pieces: one top panel (foam length + 1″ seam allowance × foam width + 1″), one bottom panel the same size, and four boxing strips (the side panels that give the cushion its depth) cut to the foam thickness plus 1″ on each edge. If adding piping, cut bias strips from a coordinating fabric and cover your cording before assembly.
Sew the boxing strips together end-to-end to form a continuous band. Attach the top panel to the boxing strip all the way around, right sides together, with a ½” seam. Clip the corners. Attach the bottom panel the same way, leaving one long side open for the zipper. Install the zipper. Turn right-side out, press the seams flat, and insert the foam-and-batting unit. The plastic bag trick makes insertion much easier: slide the foam into a large garbage bag first, insert into the cover (the bag reduces friction against the fabric), then pull the bag out through the zipper opening before closing.
The most common mistake in this step: corners that don’t align when the boxing strip is sewn to the panels. Mark the exact center of each boxing strip edge and the exact center of each panel edge, and match these points when pinning — this distributes any small sizing errors evenly rather than concentrating them at one corner.
Step Three (Alternative): The No-Sew Method
The no-sew method skips the fabric cover entirely and wraps the fabric directly around a plywood backing, stapling it in place. The result is a firm, fixed cushion — you can’t remove it for cleaning, and the finish at the corners is less refined than a sewn cover, but the process takes a fraction of the time and requires no sewing ability.
Cut a piece of ¼” plywood to your bench dimensions minus ¼” on all sides (the batting and fabric will fill the gap and create a snug fit). Layer your materials upside down on the floor: fabric face-down, batting on top, then the foam, then the plywood on top. Starting from the center of one long side, pull the fabric and batting taut over the plywood edge and staple every 2 to 3 inches, working toward the corners but leaving 8 to 10 inches at each corner unstapled. Repeat on the opposite long side, pulling firmly, then the two short sides.
Corners are where this method gets fiddly. Fold one side of fabric flat against the plywood, then fold the adjacent side over it and staple, creating a hospital-corner style fold. Trim any excess fabric bulk before the final staple. The goal is a corner that lies flat without visible lumps — it takes a few tries to get consistent, and having a second person to hold fabric taut while you staple helps considerably.

Time Estimate: What This Actually Takes
Most DIY bench cushion guides don’t tell you how long the project takes. Here’s a realistic breakdown:
Measuring and ordering foam: 15 minutes. Waiting for foam delivery: 5 to 10 business days. Cutting and wrapping batting: 30 to 45 minutes. No-sew staple method: 45 to 90 minutes for the cover, including corners. Sewn cover method: 3 to 5 hours including cutting, pinning, sewing, zipper installation, and insertion — longer if you’re less experienced with a sewing machine or if anything needs to be redone.
Total elapsed time from decision to finished cushion: roughly two weeks, counting foam delivery. Active project time: 1.5 to 6 hours depending on method and experience.
The Honest Cost Comparison
Here’s the part most DIY articles skip. The material cost of a DIY bench cushion — foam, batting, fabric, hardware, adhesive — realistically runs $80 to $180 for a standard bench. That’s before accounting for any tools you need to buy, fabric you might mis-cut and replace, or the foam order that arrives at the wrong density and needs to be reordered.
A custom-made bench cushion ordered to your exact measurements — with your choice of fabric and foam density, delivered ready to place — typically runs in a similar price range for a standard bench size. The DIY version saves money primarily if you already own most of the tools, have fabric on hand, and the project goes smoothly on the first try. The custom bench cushion options are worth comparing before you commit either direction — the price difference may be smaller than you expect, and the custom version involves no cutting, no stapling, and no two-week materials wait.
Where DIY clearly wins: unusual shapes. If your bench has angled corners, a curved front, or truly non-standard dimensions, DIY with a hand-cut foam template may be the only way to get an exact fit. Where custom clearly wins: standard or near-standard bench dimensions where the sizing is straightforward and your time is limited.
DIY vs. Custom: Quick decision guide
DIY makes sense if: You already own most of the tools, you enjoy the project process itself, your bench has an unusual or irregular shape that custom ordering can’t accommodate, or you have fabric you specifically want to use.
Custom makes more sense if: Your bench dimensions are standard or near-standard, your time is limited, you want a specific performance fabric (outdoor-grade, easy-clean), or the DIY cost estimate is coming close to what custom would cost anyway.
Either way, accurate measurements are the foundation of a bench cushion that actually fits. The measuring guide covers both DIY and custom ordering scenarios — what to measure, where most people go wrong, and how to handle irregular bench shapes. Five minutes with that guide before you start either process saves a lot of frustration later.

Whether you make it yourself or order it made to your measurements, a bench cushion that fits correctly and uses the right materials will hold up for years rather than seasons. That’s the outcome worth optimizing for — however you choose to get there. Browse the full range of custom cushion options if you want to compare before deciding.